Christmas time is my favorite time of year! Each year I count down the days until I can put up my trees, they are my favorite creative outlet and each one is a labor of love and a work of art. I’ve learned a lot throughout the years, I want to share with you the steps I always follow when creating my trees. You can see my favorite tree last year and my Christmas 2015 home tour I shared with my friends over at Magnolia lane.
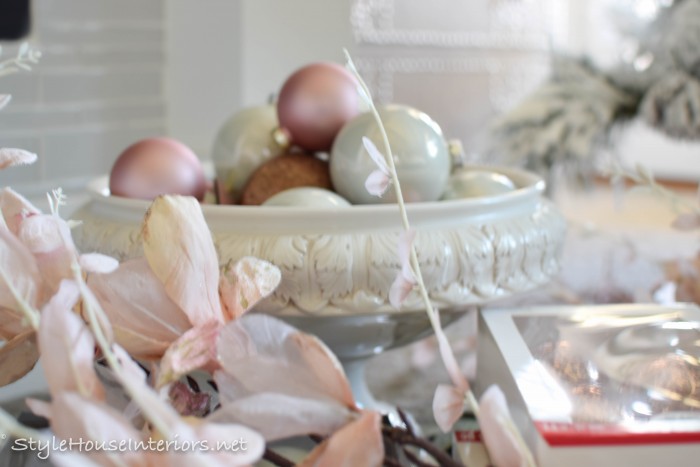
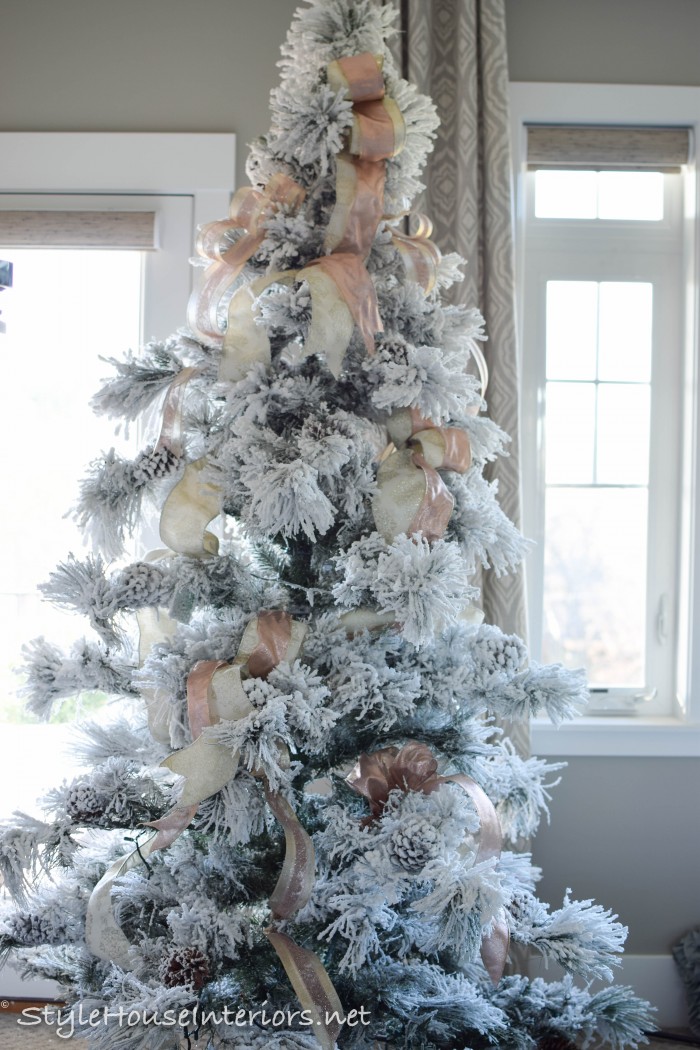
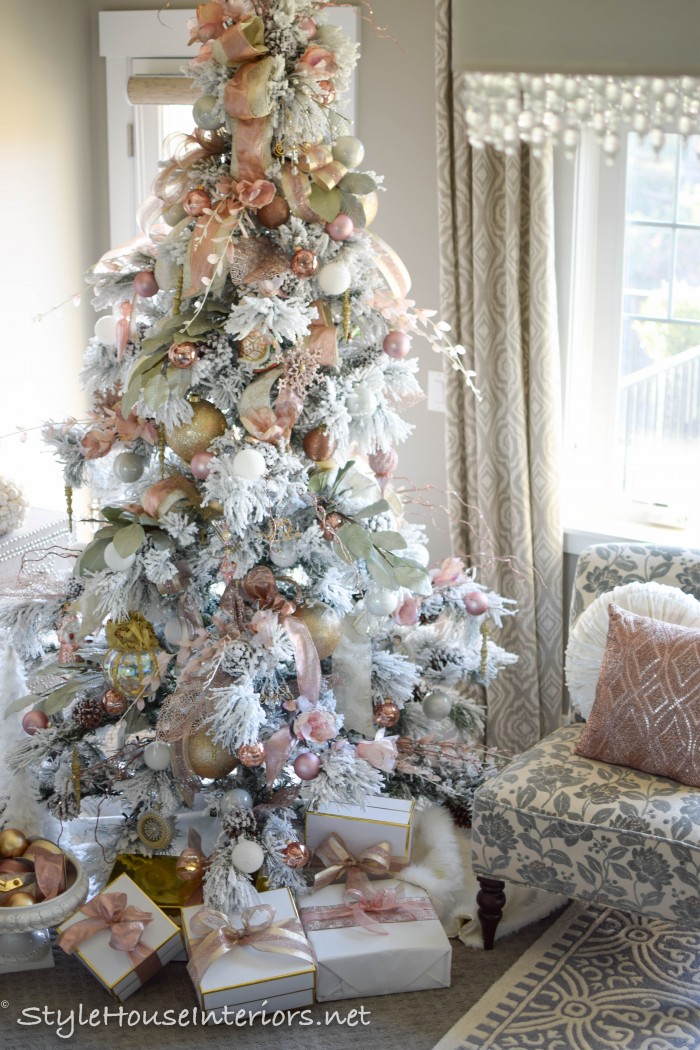
Step One ~ I start off by determining my color scheme, sometimes I opt for non traditional colors and I match the tree to the decor in the room. For the tree I’ll be decorating today, I chose to use a Blush and rose gold theme.
Step two~ I look for several items when I’m putting a tree together.
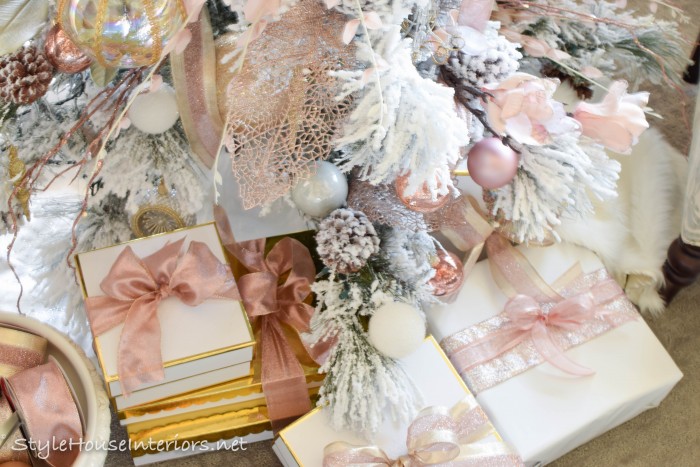
- Ribbon (I like to use at least two different coordinating ribbons on the tree.)
- Large or oversized ornaments.
- Unique ornaments.
- Floral stems or garland.
- Christmas stems or picks.
The amount of ribbon and ornaments varies on the size of the tree. This tree is a 7.5′ tree, I used 3 different ribbons (use at least 2.5′ wide) on the tree (I set a few aside for later). I purchased several packages of inexpensive shatterproof balls in different colors, I added those to a collection of gold ornaments and a few blush ornaments that were passed to me from my mother. *tip look for items you may have to work into your tree to cut down on costs. I also try to incorporate meaningful ornaments into each of my trees.
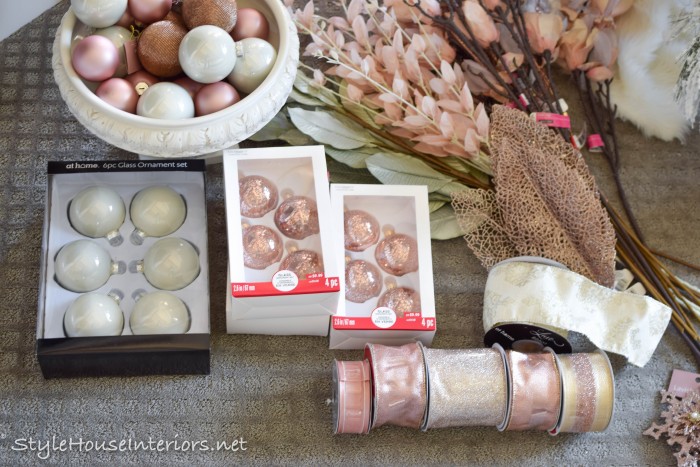
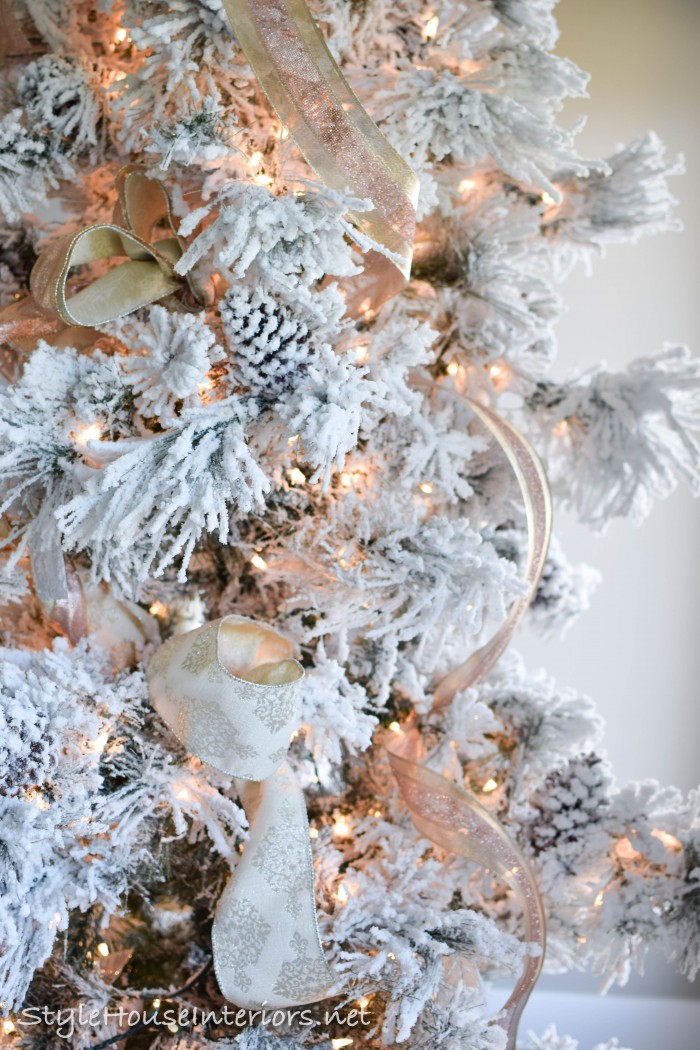
As you can see, I use several different types of greens or floral stems. Some of my favorite stores to stock up on greens are Hobby Lobby, At Home, and Micheals.
(affiliate links below contain similar items for your convenience)

Step three~ ***Pro tip when you are fluffing your tree, keep an eye out for burned out bulbs. They put a strain on the entire strand and they’ll all burn out faster.
Once my tree is up and fluffed and I’ve double checked to be sure all the lights are working (easier said than done sometimes!) Then it’s time to start ribbon. This is a hard one to master for some. I am showing you the method I use. It’s personal preference, but I don’t like to wrap it around the tree, or use bows. I feel like my eye tries to follow where the ribbon is going. In my opinion, if it’s trailing down the tree, or spiraled around the tree it draws the eye. If it’s not symmetrical that’s the first thing you notice. Again, that’s just my personal opinion and preference.
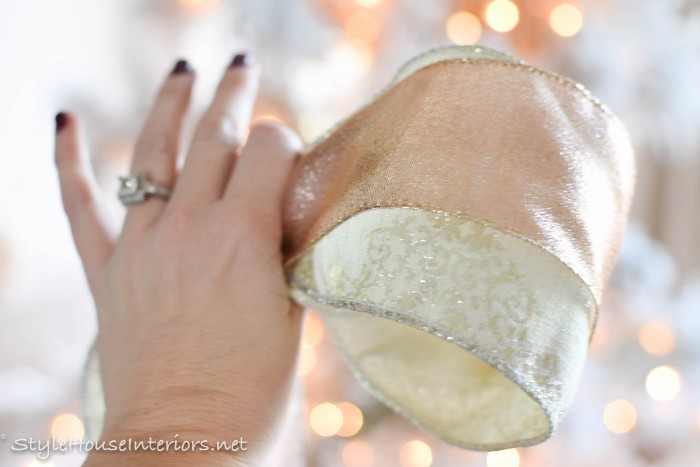
I usually start by overlapping two different kinds of ribbon, if I have one that’s larger it goes on the bottom.
I make my first loop, you’ll also need light gage wire and wire cutters.
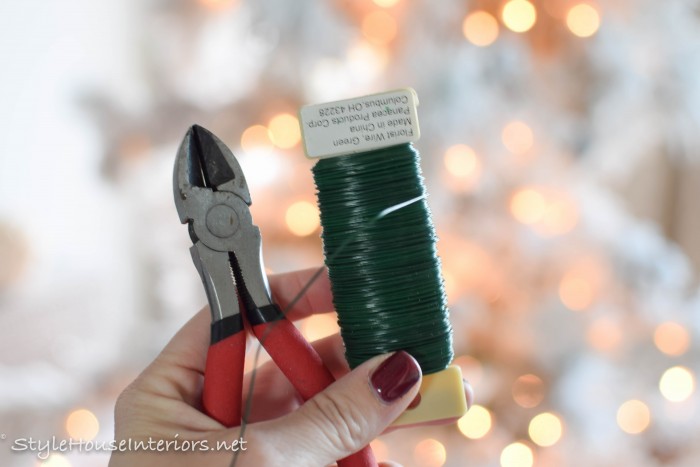
Wrap the wire around leaving the tails long enough that you can add another loop.

Because I’m not making a bow, I want my second “loop” to be a little longer than the first. Take the uncut portion of the ribbon and pull it up to meet the first loop. Make sure you’re not flipping it up so that the back side is showing. Leave the tail of the ribbon hanging down the tree and use the wire to secure your loops near the top of the tree.
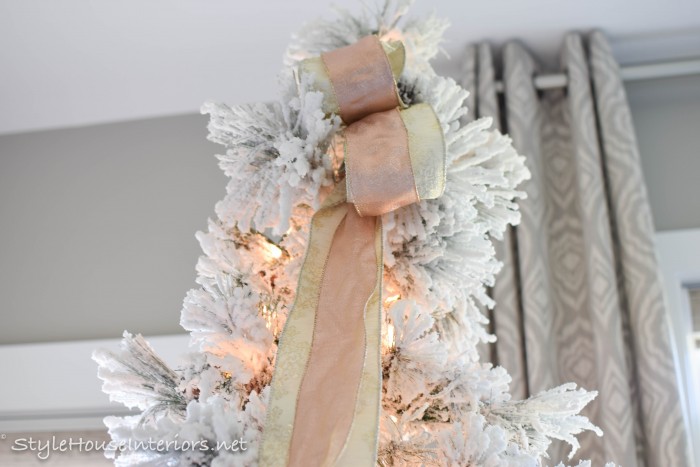
Next you’re going to take the tail that’s trailing down and tuck it into the tree so there’s an even larger loop.
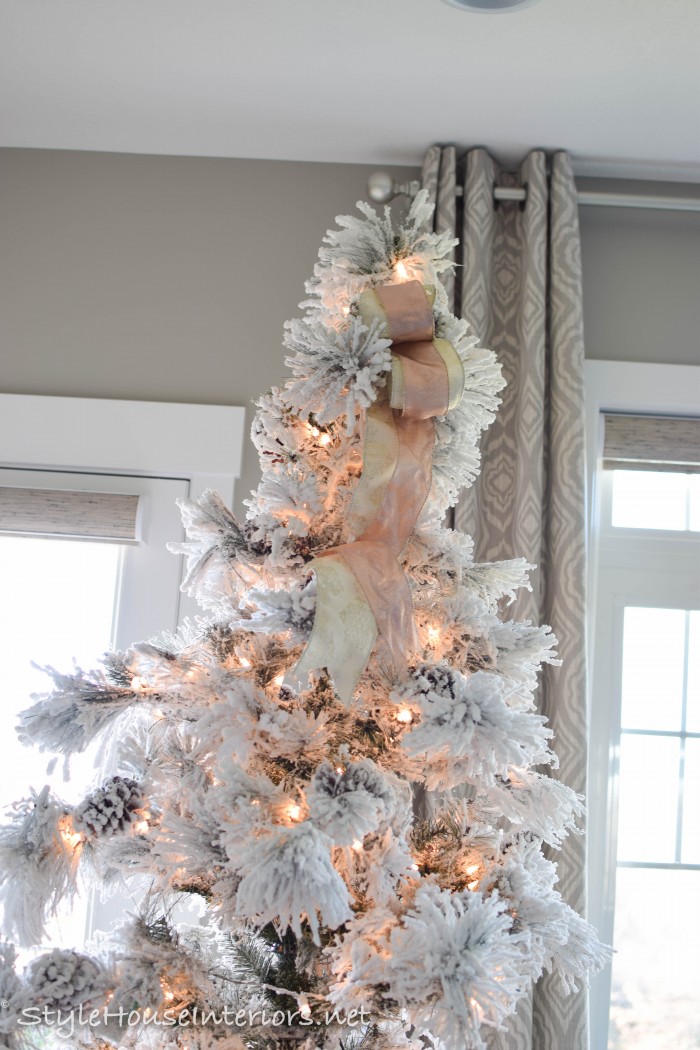
I clipped the ends of the ribbons to start another loop elsewhere, but you can also run the ribbon through your tree and pull it out in a different spot. After I finish with that set of ribbons I move on to my third option if I have one. Starting loops in different spots on the tree cutting the tails to trail just a bit.
If the ribbon wants to curl I try to let it fall naturally in some spots
***Pro tip Use the branches of your tree to hold your ribbon in place. Most trees have branches that are easy to bend and manipulate, I wrap them around the ribbon deep in the tree so you can’t see the end of your loop.
Step four~ After the ribbon is done I start with my largest ornaments first. I lay them all in like piles before I start, that way when I’m adding them all at once I can be mindful that I’m placing them evenly throughout the tree. 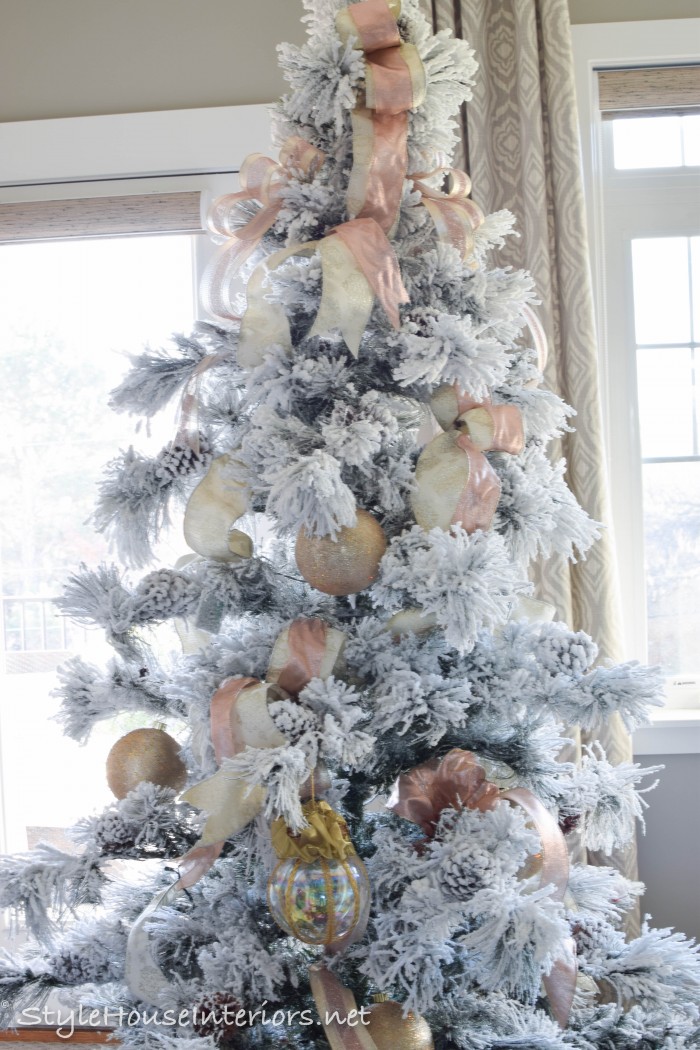
Using different sizes and shapes of ornaments on your tree adds interest.
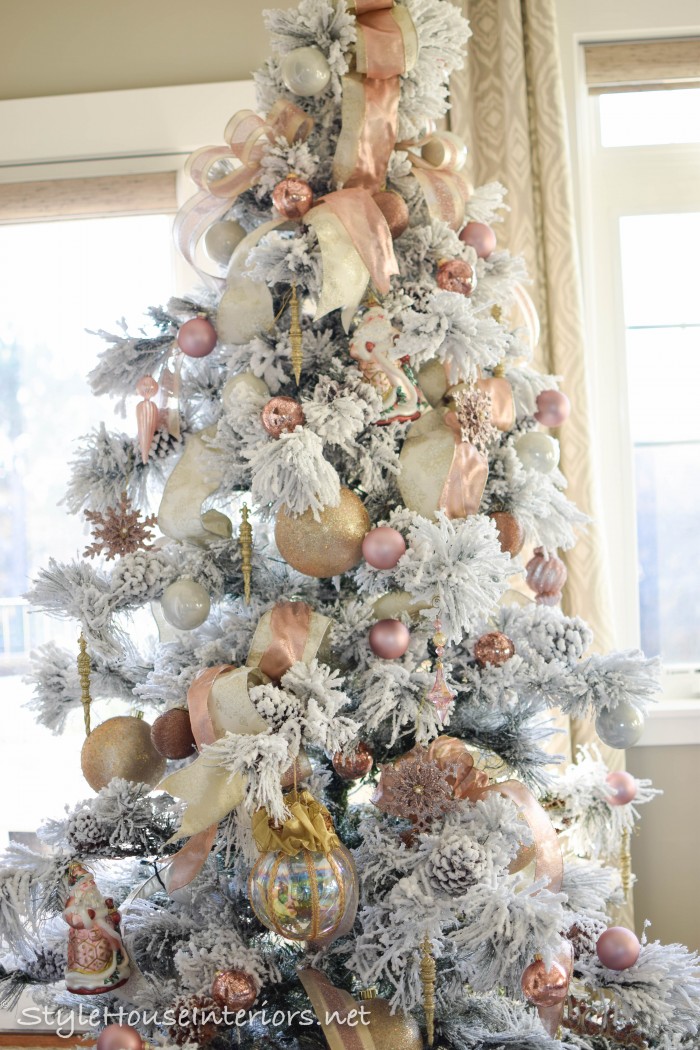
Step five~ Floral stems make great fillers, once you are done with ornaments look for any bare spots and added greenery.
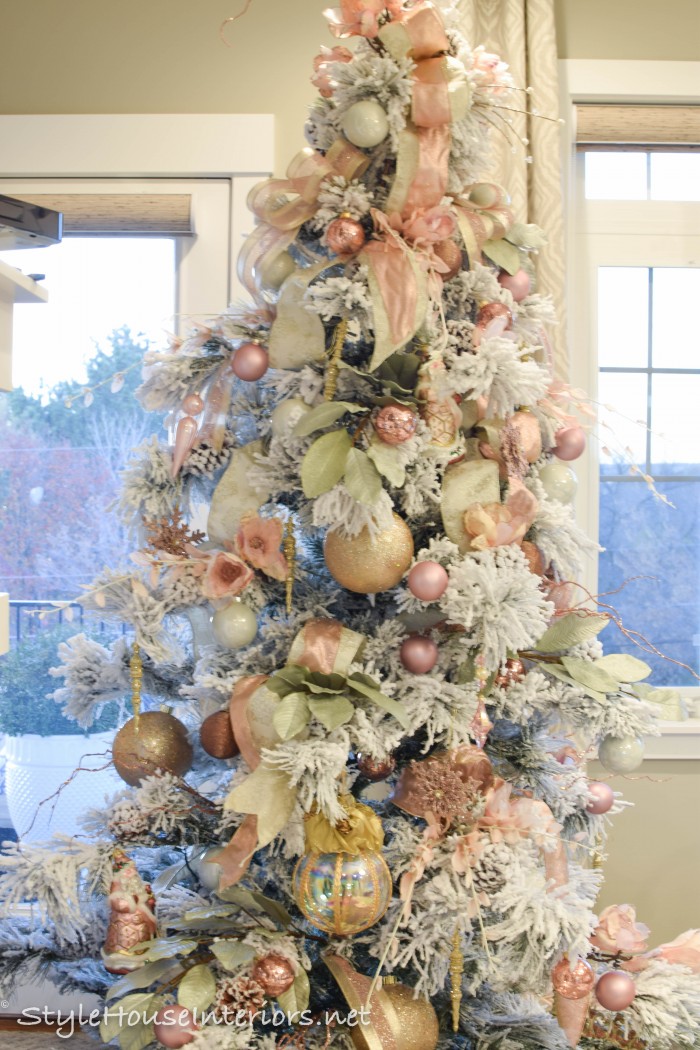
(I apologize for the terrible lighting) I usually just shove the stems in the tree, no need to wire them. This tree has long branches so I like to place the florals on top of the longer branches, leaving them hanging out just a tad and always drooping a bit downward.
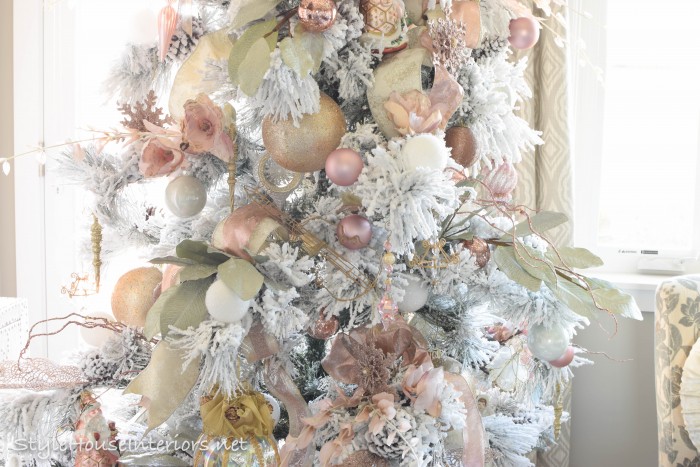
The best place to tuck a few stems is right in the fold of your loop so the tail runs down under it.
Once you are done tweaking every thing (it’s ok if you need to move a few ornaments) you can step back and enjoy your creation! 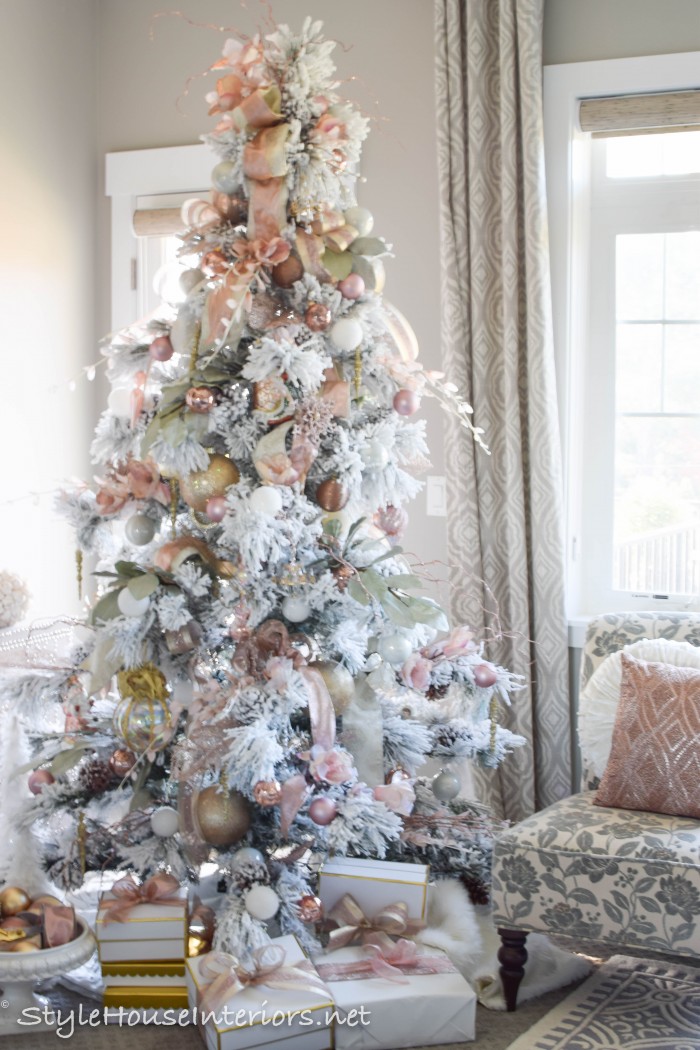
I almost forgot! Use the extra ribbon you set aside to coordinate with your gift wrap.
I love to hear what inspires and if you found any of these tips useful! Enjoy the Holiday season! Check back for more Christmas posts and tours!
XO
Jen

This is just beautiful! I can’t stop staring at the photos, thank you for sharing the tips! I’d love the details on your tree, I’ve not seen a flocked one with branches like that- love it!!
Thank you Sarah, I love this tree so much! I actually have it in the 10′ size as well! The long needle branches are so realistic. I linked one that is pretty similar in the post. I appreciate your compliments so much, I really enjoyed creating this tree! 🙂
Your tree is beautiful. Thanks for the tips they are very helpful.
Thank you Julie, I am so happy that you found my tips helpful! Happy Holidays!
Such a gorgeous tree!! Love the white and blush pink! Thank you for sharing your tips, I’m going to try doing ribbon this way!
Thank you Kim! Let me know if you have any questions, I wasn’t sure if I was explaining well. I wasn’t going to do a video though! Happy decorating! 🙂
Beautiful. My dream tree. Thank you for sharing. Merry Christmas.
Thank you Shirley! Merry Christmas to you!
What a great tutorial for creating such a beautiful tree! Thank you☺ The way you use your ribbon is inspiring and I’ll be using that tip this year!
Natasha Kalita Design
Thank you so much Natasha! I am so glad you found it inspiring 🙂 Happy decorating and Merry Christmas!
wonderful tutorial! I especially appreciate the tips on placing the ribbon. I have the same perspective you do – my eye follows the path of the ribbon and it drives me bonkers when I can’t spiral it perfectly, so I end up ditching it. Your way looks fab and is sooo much easier to balance. I also loved your whole Master Bedroom tour – what a gorgeous room! : )
Thank you so much Elizabeth 🙂 I am happy you found it useful! Merry Christmas!